 |
 |
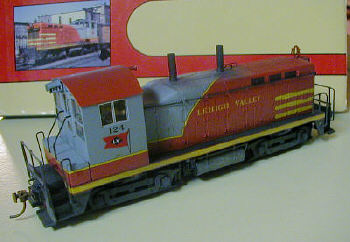
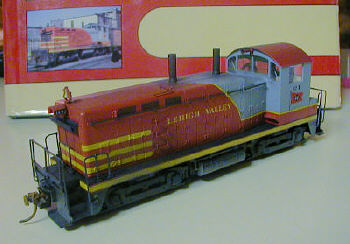
Curt reworked a Kato NW2 kit to represent NW1 #124 in the pre-war paint scheme.
LV 112 (SW1), by Doug Kisala

I purchased one of the revised Walthers HO SW1 diesel switchers late in 2013. I decided to represent surviving Lehigh Valley SW1 112 as she appeared in the early 50s. I was initially shooting for the unit’s appearance circa 1948, but I just found out 112 had her delivery scheme as late as October 1950.
Figuring out disassembly was my first hurdle. Eventually I figured out that gently prying up on the cab was the way to start. Once the cab was off, I gently lifted up the hood from the rear. I was able to gently pry out the cab window clear styrene and the forward headlight clear styrene, but I could not dislodge the clear styrene from the rear headlight. I ended up removing the rear headlight LED and associated wiring pending a better solution.
I stripped the model of paint, and I ended up using a spray can of Model Master red for the carbody color. I have had no luck brushing red or yellow paint, even with a good primer coat.
There’s a terrific shot of SW 110 on page 21 of Morning Sun’s “Trackside around Sayre-Towanda-Waverly with Lloyd Hall.” I used that photo and the shots of SW1 118 on page 42 from the same book for decal placement and as a general painting guide.
Based on those photos, I think LV diesel paint schemes were in a considerable state of flux from 1950-1951. The photo of SW 110 is dated February 1950, and that unit has black handrails. The photos of SW1 118 on page 42 of the book are dated March 1951. The freshly painted 118 has black handrail posts, yellow handrails, and yellow step edges. I would really appreciate clarifications from our diesel experts. For now,
I’ve left the handrails on the model in red pending the best answer.
Since the 112 was probably not repainted until 1951, she probably got the plethora of yellow paint and additional grab irons on the fireman’s side, which the Walthers model lacks. This photo probably dates from the early 50s, but definitely after October 1950. For now, I painted over the model’s rear headlight with Tamiya Aluminum pending a better idea.
I used Microscale decal sets for the lettering and striping. Because of all of the stripes and cutting and fitting, it took about a week. I took my time and enjoyed applying a stripe or two at a time. I used a Soundtraxx motor-only 8 pin decoder. The unit easily handles six passenger cars or eight freight cars on my little layout.