Available exclusively from the Anthracite Railroads Historical Society
Manufactured for the ARHS by David Rose of Detail Model and Machine
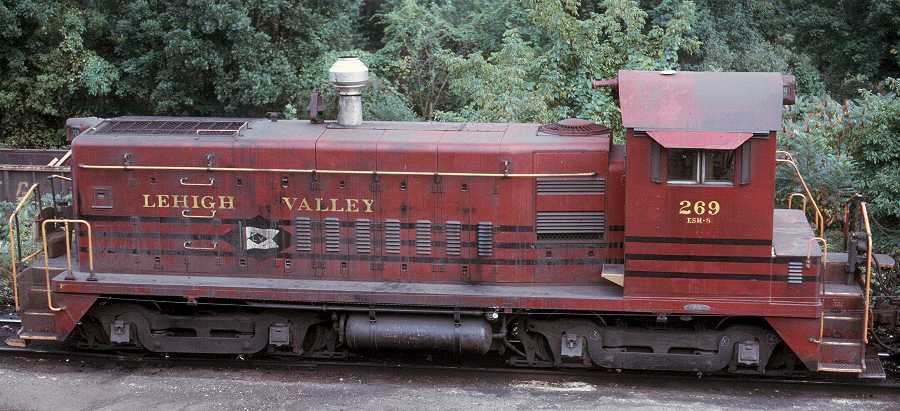
Photo by Gary Stuebben
Accurately model the Valley’s “Pups” in HO scale from Life-Like’s Proto 2000 SW8 with this resin conversion kit that supplies most of the parts you’ll need. A detailed description of the kit and how to use it are included below.
Kit Description
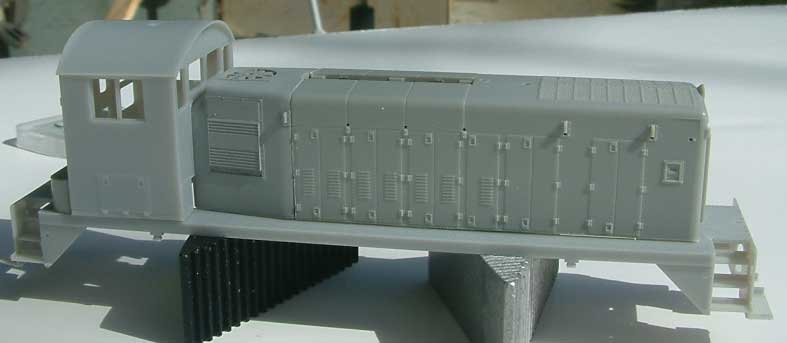
Photo by Gary Stuebben, showing master hood replacement part fitted to Proto 2000 hood
What is included
- A resin casting that replaces the rear section of the hood on the Proto 2000 SW8. This part has all dynamic brake detailing molded in, including fan blade detail so a see-through fan can be used at the modeler’s option. Interior clearance is at least as much as the stock P2K SW8, and sufficient for the mechanism and a DCC decoder (NCE’s SW9-SR decoder is a drop-in replacement for the P2K circuit board).
- A 36″ exhaust fan, which is solid resin, but nicely detailed. Modelers wishing to take the detail level to a higher standard can substitute a see-through fan such as the 36″ fan from the Life-Like Proto 2000 SD7, SD9 or E8, the Intermountain F unit, or the Highliners F-unit.
- A rear platform step box to fit between the battery box and the rear drop step. This has a tread pattern to match the P2K walkways, and is sized so that the modeler can use either the P2K drop step or a Detail Associates #1401 drop step, which is more accurate.
- A bracket for mounting a Nathan M3 horn to the front of the cab.
- A filler plate for the right front face of the cab, where the heater duct would fit on a standard SW8 without dynamic brakes.
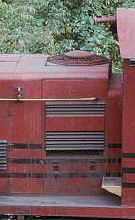
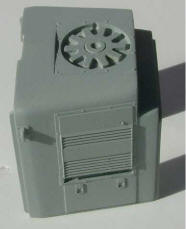
The replacement hood section has the dynamic brake cooling air intake louvers molded into the sides, and a fan set into the fan mounting plate on the top. On the left side of the hood, there is an access door with knuckle buster latches that match the detail on the Proto 2000 hood.
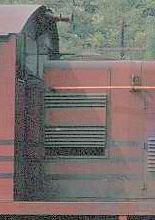

On the right side of the hood, there is no access door. The rear mounting points for the handrail are included on the dynamic brake louver assembly.
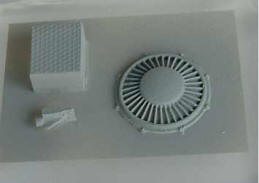

Separate detail parts include a fan (solid, not see-through), a step-over box to fit between the battery box and the rear drop step, a horn mounting bracket to fit on the front wall of the cab above the windows, and a filler plate (shown in the right side photo only) to close the gap in the front cab wall left by omitting the heater duct. The heater duct was inside the dynamic brake section on the DB equipped SW8’s, but on standard units was inside a small box mounted in the corner between the right hood side, the walkway and the cab wall.
What you must supply
- A Life-Like Proto 2000 SW8. The most recent release of the undecorated SW8 kit is recommended, since it will include all the proper parts for the LV’s dynamic brake equipped SW8s, including the proper walkway with closed steps, proper sized fuel tank, six louver battery box, cast (curved top) buffer plate, and MU style end handrails. A few of the LV “pups” were rebuilt with straight handrails and no drop step on front even though their MU capability was retained, so check photos of the unit you are modeling or see the listing of variations on the Pups page. An earlier undec release has all those parts except the curved top buffer plate. Unfortunately, the Proto 2000 factory painted SW8s depict LV 275 and 276, which had no MU at either end, so if you start with one of these, you’ll need to order or make replacement end handrails and stanchions. A P2K SW9 could also be used, but you would have to remove the rear exhaust stack. Also, the open steps of the P2K SW9 are incorrect for LV SW8s.
- Three-chime horn to replace the single chime horn supplied in the Proto 2000 kit. Most LV SW8s were eventually fitted with Nathan M3s, but there were exceptions, so check a photo of the unit you are modeling. The only HO scale Nathan M3 plastic kit with three chimes facing forward was the Detail Associates no. AH-1601, but it may be hard to find. A brass version by Cal Scale (Walthers part 190-428) is another option.
- If you want to have a see-through fan as on other P2K models, you can replace the solid cast resin fan with a detailed fan and blade assembly such as a Proto 2000 36″ fan replacement part from one of their kits. These are see-through housings with separate fan assemblies, and will fit into the hole in the mounting plate on the hood top. Possible sources are:
- Part #584747 (SD7 Ventilators), a set of six 36” fans. SD9 or E8 have similar parts. These are generally considered to be the most finely detailed.
- Similar parts package for the P2K GP7 or GP 9 Phase I. Not quite as nice as the parts above.
- If you want the kit to be accurate, you must move the rear mounting point for the handrails forward. This can be done by cutting the handrails at the last hood-side lift ring and cementing them back together, or making new handrails from wire. Although the prototypes with and without dynamic brakes had the same length handrails, the P2K handrail is too long.
Download a copy of the instruction sheet in Adobe Acrobat PDF format. Latest update posted 4/9/2021. Further updates will be posted if necessary.
Will this conversion work with the Athearn SW7?
Several people have asked whether this kit will convert the Athearn SW7, which has a hood that is wider than scale so that the original Athearn motor could fit inside it. To use this conversion kit as designed with Athearn’s SW7 body you would have to either narrow the Athearn hood, which is not easy because of the exhaust grill on top, or widen the resin hood rear section to fit the unmodified Athearn hood. This would require cutting out the DB exhaust fan mounting plate, splitting the hood section down the centerline and building up the thickness with plastic strip, then reinstalling the fan mounting plate. A lot of work to build an inaccurate model! An easier approach, if you MUST use the Athearn kit, would be to scratchbuild the rear hood to match the profile of the kit section using the resin part as a guide, then cutting the detail out of the resin hood section and applying them separately. Other changes, such as removing one of the exhaust stacks and shaving off some of the hood door louvers, are standard conversion procedures.
Acknowledgements
This project would not have been possible without the help of many people. Special thanks to Larry Grubb of Life-Like for supplying a copy of their drawings for the SW8 body, and sample bodies for use in developing this kit. Photos by Alan Morscher, Gary Stuebben and John Gabriel were invaluable for the initial determination the dimensions of the dynamic brake louvers. Rich Jahn provided reference photos and info throughout the design phase and into the preparation of this page. John M Gabriel photographed R&N 803 (ex-LV 270) to answer key questions about the shape of the hood, even though the dynamic brake louvers and fan have long been removed. Tom Winlow carefully critiqued the drawings and participated in a dialog that led to several improvements in accuracy. Ken Bealer provided measurements that he made of the louvers on LV 270 before they were removed, and detail photos of some of the unique features of LV SW8s, including the raised walkway between the battery box and the rear drop step, which doesn’t show in most photos. Ed Heck of Reading and Northern RR graciously arranged for John Gabriel and I to be able to measure 803 to nail down the shape of the hood in the dynamic brake section.- Ed Schaller
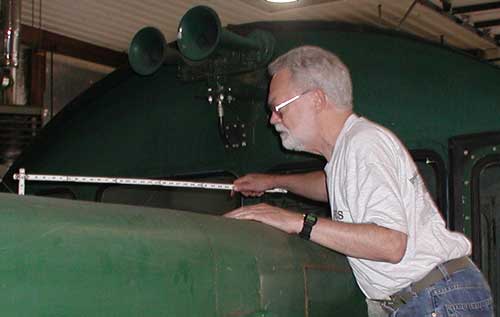
Photo by John Gabriel – That’s Ed, measuring the height of the “notch” in front of the dynamic brake exhaust fan mounting plate on RN 803.